
It was about 19 degrees in a grocery store parking lot when a guy flagged me down. His wife's crossover was dead, the headlights had been left on, and he had a set of jumper cables still wrapped in the plastic from the auto parts store. He'd never used them. He told me, half-joking, that he was scared of "blowing up the computer."
I get that fear all the time. Modern cars are rolling networks of control modules, and the horror stories about fried alternators and dead ECUs make people nervous. The truth is calmer than that. A jump-start done in the correct order is safe, and it takes maybe five minutes.
Do it out of order, or get sloppy with the clamps, and you can throw a real voltage spike at the electronics. So let me walk you through exactly how I do it, the same way I'd show you if I were standing next to your car with the hood up.
First, Confirm the Battery Is Actually the Problem
Before you touch a single cable, make sure you're chasing the right gremlin. A dead battery has a specific signature. You turn the key, the dash lights go dim or flicker, and you hear a rapid clicking or nothing at all from the starter.
If the engine cranks normally but won't catch, that's a fuel or ignition issue, and a jump won't fix it. Same goes if your dash is lit up like a Christmas tree with codes you don't recognize. Knowing the difference between a flat battery and a deeper fault is part of reading what your dashboard warning lights are actually telling you.
One more quick check. Look at the battery itself. If you see a cracked case, leaking fluid, or a bulged side, stop right there. A damaged battery should never be jumped.
If the battery is visibly swollen, cracked, or you smell rotten eggs (that's sulfur from an overheated cell), do not attempt a jump-start. Call for roadside assistance instead. A compromised battery can vent hydrogen gas or, in rare cases, rupture.
Gather Your Gear and Park the Cars Right
You need two things: a good set of jumper cables and a running donor vehicle, or a portable jump pack if you carry one. Heavier gauge cables (4 or 6 gauge) deliver current better than the thin bargain-bin sets that barely move a needle.
Pull the donor car nose-to-nose with the dead one, close enough for the cables to reach but not touching. Both cars in park (or neutral with the brake set for a manual), both ignitions off, both parking brakes on.
Pop both hoods and find the battery terminals. The positive is marked with a plus sign and usually wears a red cover. The negative has a minus sign. Some newer cars hide the battery in the trunk or under a seat and give you a remote positive post under the hood, so check your owner's manual if you can't find an obvious battery.
Keep a cheap pair of mechanic's gloves and a flashlight in the glovebox with your cables. Dead batteries never happen in good weather or in daylight. I promise you that.
Connect the Cables in This Exact Order
This is the part everybody gets wrong, and it's the part that actually protects your electronics. The order matters because of where you make that final connection. Do it slowly and double-check each clamp before moving to the next.
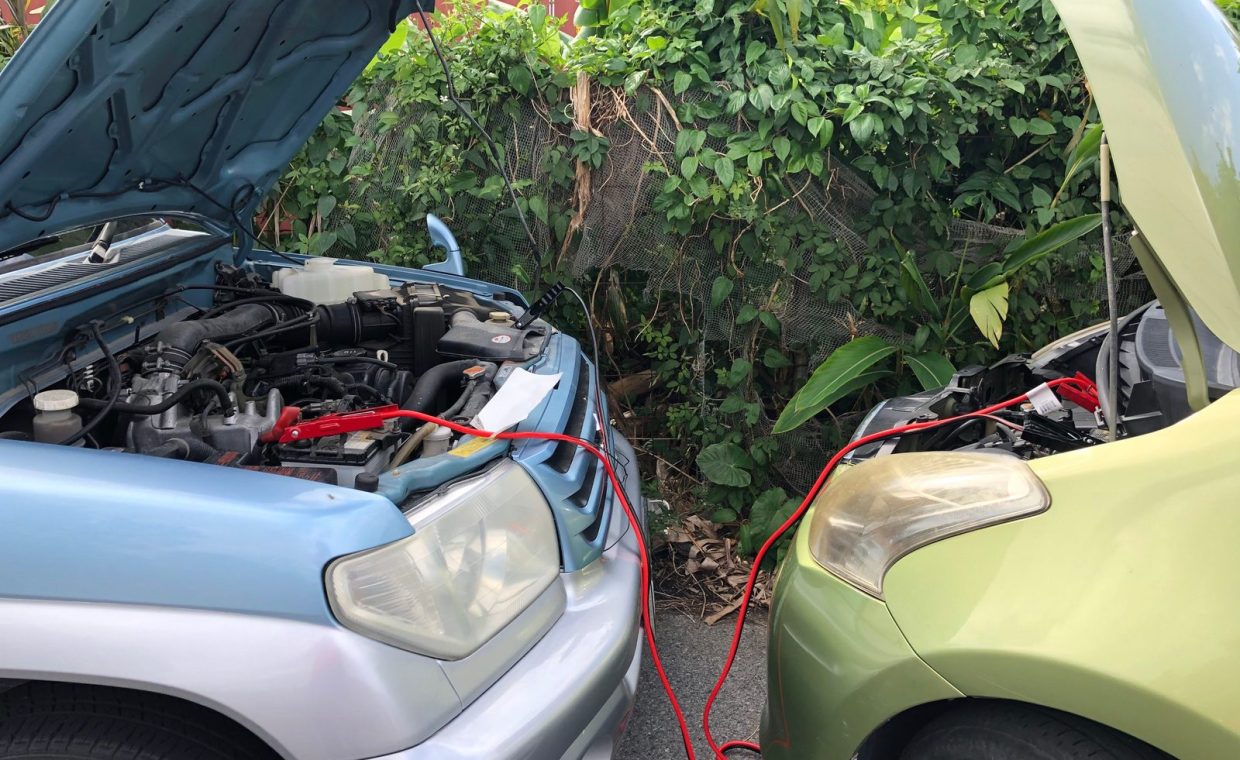
- Red clamp to the dead battery's positive (+) terminal. Get a solid bite on the metal post.
- Other red clamp to the good battery's positive (+) terminal. Same firm grip.
- Black clamp to the good battery's negative (-) terminal. This grounds the donor side.
- Final black clamp to a bare metal ground on the dead car, NOT the battery. Use an unpainted engine bolt or a bracket several inches away from the battery.
That last step is the one people skip. Clamping the final black cable to bare engine metal instead of the dead battery's negative post keeps the inevitable spark away from the battery, which can be off-gassing flammable hydrogen.
When you complete the circuit, you get a tiny spark. Right at the battery, that spark sits in a cloud of hydrogen gas. Grounding to the chassis or engine block instead moves that spark to safe air. It also gives a cleaner electrical path, which is gentler on sensitive modules.
Start the Cars and Let the Charge Flow
Start the donor car first and let it idle for two or three minutes. This pushes some charge into the dead battery so the starter isn't pulling everything through the cables at once.
Now try the dead car. If it cranks slow but doesn't start, give it another minute or two and try again. Don't crank for more than about ten seconds at a stretch, or you'll cook the starter motor.
If it fires up, great. Leave both cars running and let the revived one idle for a minute before you touch the cables. If it still won't turn over after several tries, the battery may be too far gone, or you've got a deeper electrical fault that a jump won't solve.
Disconnect in Reverse, and Mind the Spike
Removing the cables is where a careless move can send a voltage spike into the system. Pull them in the exact reverse order you put them on, and don't let the clamps clang together or touch metal.
- Black clamp off the dead car's ground point first.
- Black clamp off the good battery.
- Red clamp off the good battery.
- Red clamp off the previously dead battery.
Here's a small trick that saves your electronics. Before you disconnect, switch on a load in the revived car, like the rear defroster or the headlights. That gives any momentary voltage surge somewhere to go besides your control modules. It's a cheap insurance policy.
| Step | Connect Order | Disconnect Order |
|---|---|---|
| 1 | Red to dead (+) | Black off dead ground |
| 2 | Red to good (+) | Black off good (-) |
| 3 | Black to good (-) | Red off good (+) |
| 4 | Black to dead car ground | Red off dead (+) |
Drive It and Figure Out Why It Died
A jump gets you moving, but it doesn't recharge the battery on its own. Drive for at least 20-30 minutes, ideally at highway speed, to let the alternator put real charge back in. Short trips around town won't cut it.
Then ask why it died. If you left a light on, mystery solved. But if the battery went flat with no obvious reason, you may have a parasitic drain, a tired battery near the end of its life (most last around 4-6 years), or a charging system problem.
This is exactly the kind of basic diagnostic you can handle in your own driveway, the same confidence you build the first time you change your own oil at home. And if anyone tries to upsell you on a fancy "performance" battery or a magic voltage stabilizer, save your cash. That's right up there with the other performance myths that quietly drain your wallet without doing a thing for a stock daily driver.
Confirm it's the battery, park nose-to-nose with both cars off, connect red-to-dead, red-to-good, black-to-good, then black-to-bare-metal-ground. Start the donor, then the dead car, disconnect in reverse, and drive 20-30 minutes to recharge.
Can jump-starting a car damage the computer or electronics?
Done in the correct order, no. Damage usually comes from reversed polarity (red on a negative post) or careless disconnection that sends a voltage spike. Follow the connect and disconnect sequence above and your modules will be fine.
How long should I drive after a jump-start?
At least 20-30 minutes, preferably on the highway where the engine runs at higher RPM and the alternator charges faster. A few minutes of idling or short stop-and-go trips won't restore enough charge to start the car again later.
Why connect the last clamp to bare metal instead of the battery?
That final connection always makes a small spark. A charging or discharging battery can release flammable hydrogen gas, so you keep the spark away by grounding to an unpainted engine bolt or bracket a few inches from the battery instead of the negative post.
Jump-starting isn't the scary, electronics-frying gamble people make it out to be. It's a calm, ordered little procedure, and once you've done it right a couple of times, it becomes second nature. Keep a decent set of cables in the trunk, remember the red-red-black-ground rhythm, and you'll be the one helping the next stranded driver in a cold parking lot.