
A listing that looks too clean for the price is the oldest trap in the used market. Photos shot at flattering angles, a description full of confident adjectives, and a number that sits noticeably under every comparable car will pull a buyer toward the cash before the questions even form. The reasonable feeling in that moment, that you have stumbled onto something everyone else missed, is exactly the feeling a careful seller is counting on.
The good news is that a genuine deal and an expensive mistake usually look identical for about the first ninety seconds, and then they stop. A small handful of checks, done in order and in daylight, is what separates the two. You do not need to be a mechanic to run them. You need a routine, a bit of patience, and the willingness to walk away. Here is the 12-point check worth running on every used car before anyone signs anything.
Bring a phone with a flashlight, a magnet, a tire tread gauge or a quarter, a rag for your hands, and the listing printed out. Inspect in daylight, never under streetlights or in the rain, because wet paint hides everything.
Walk the body and panels in good light
Start outside, on a dry day, with the car parked on level ground. Crouch at each corner and sight down the length of the body so the panels catch the light.
You are looking for waves, ripples, and color mismatches between panels. Gaps between the doors, hood, and fenders should be even and consistent. A door that sits proud on one side, or a trunk gap wider at the top than the bottom, often means the car was hit and reassembled.
Run your hand along the lower edges and wheel arches feeling for bubbles under the paint. That bubbling is rust working its way out from the inside, and it never gets cheaper to fix.
Check for hidden body filler and rust
This is where the magnet earns its place in your pocket. Body filler is not magnetic, so a fridge magnet will cling firmly to clean steel and slide or fall off where filler hides a repair.
Test the lower doors, the rear quarters, and the corners of the hood. A weak grip in one spot, while the rest of the panel holds strong, is a quiet sign of past damage.
Open and close every door, the hood, and the trunk yourself. They should latch with a solid sound and swing without sagging. A door that drops as it opens points to worn hinges or a tired chassis.
Read the tires like a logbook
Tires tell you how the car has been driven and whether the suspension is healthy. Check the tread depth with a gauge or a quarter, and look at how the wear is spread across each tire.
Even wear across the whole surface is what you want. Wear heavy on one edge usually means the alignment is off or a suspension part is worn. Patchy, cupped wear can mean failing shocks.
Glance at the date code stamped on the sidewall too. Tires older than six years can be hard and cracked even with plenty of tread left, and a matched set of four is a small reassurance that someone cared.
Open the hood and study the engine bay
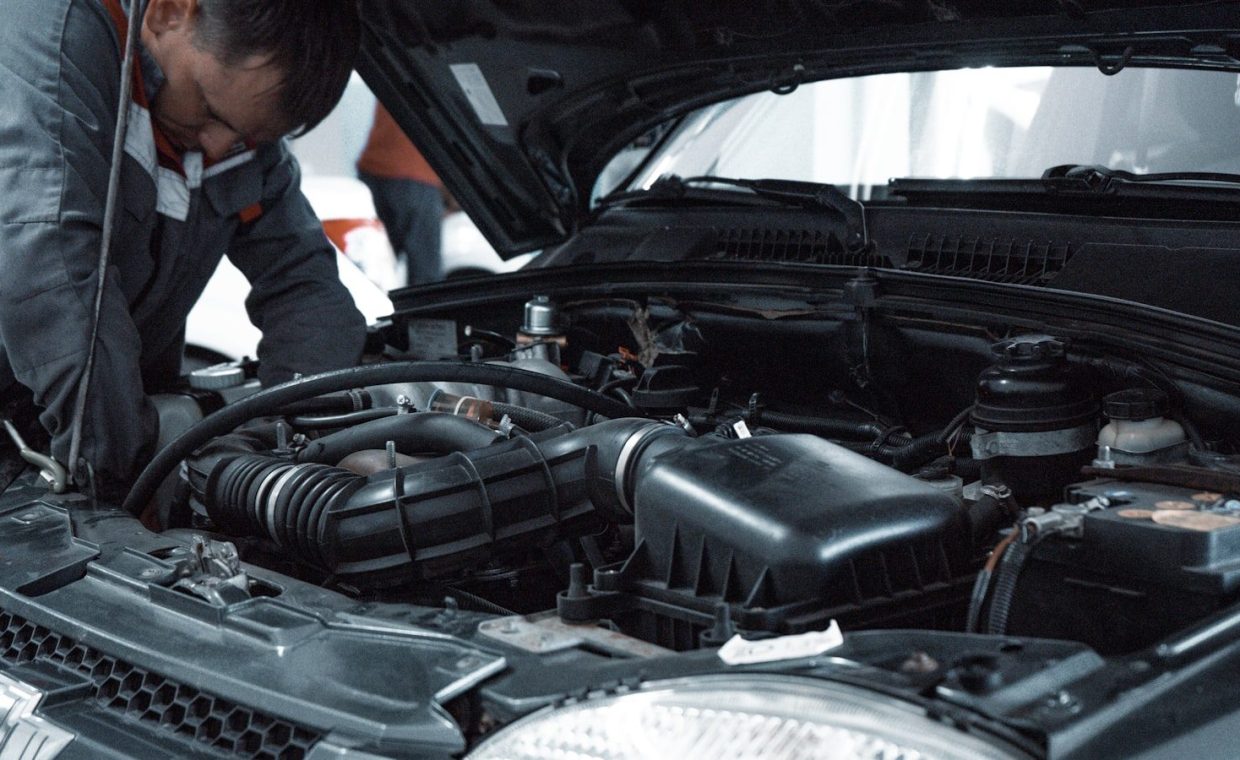
Pop the hood while the engine is still cold, because a cold start tells you more than a warm one. First, just look.
A spotless, freshly degreased engine bay on a high-mileage car can be a red flag, not a selling point, since steam cleaning hides leaks. You want to see honest, even grime, not fresh oil pooling anywhere.
- Pull the oil dipstick and check the color. Light brown is good, gritty black is overdue, and a milky tan film hints at coolant mixing in, which is bad news.
- Check the coolant in the reservoir. It should be clean, not rusty or oily.
- Squeeze the upper radiator hose. It should be firm, not mushy or rock hard.
- Scan the belts for cracks and the battery terminals for white corrosion.
Look underneath for leaks and damage
Before you start it, glance at the ground under the car. A clean patch of pavement is reassuring. Dark wet spots, a sweet smell, or a red puddle (transmission fluid) all deserve questions.
If you can crouch and look beneath the engine and along the underbody, do it. Fresh oil on the bottom of the engine, a crusty exhaust held together with clamps, or bent and scraped floor pans tell their own stories.
A used price that looks far below similar cars almost always hides a reason. Salvage titles, flood damage, and frame repairs love to wear a cheap price tag. If the deal feels too generous, slow down and dig harder rather than faster.
Inspect the interior and every switch
Climb in and sit for a moment. Does the wear match the odometer? Shiny, worn pedals and a polished steering wheel on a car claiming low miles do not add up.
Now work through the electronics methodically, because modern cars are full of small motors and modules that cost real money. Test the windows, the locks, the mirrors, the seat adjusters, the wipers, the lights, the horn, and the infotainment screen one by one.
Run the air conditioning until cold air actually arrives, then switch to heat. A blower that only blows warm or an AC that never gets cold can mean an expensive repair waiting for you.
Turn the key and watch the dashboard
Here is a step people skip in their excitement. With the key in the on position but before cranking, every warning light should illuminate and then go out as the engine starts.
If the check engine light, ABS, or airbag light never comes on at all, someone may have removed the bulb to hide a fault. A light that stays on after start is telling you something directly.
Listen to the cold start. A brief rattle that fades is usually fine. A persistent tick, a knock, or blue smoke from the exhaust on startup are the kind of sounds that turn into invoices.
Take a real test drive, not a lap of the block
This is the most important single point on the list, so treat it like an appointment. Drive at least fifteen or twenty minutes, mixing slow streets with a stretch of highway.
Turn off the radio. You want to hear the car, not the speakers.
- On a straight, empty road, loosen your grip briefly to feel if the car pulls to one side.
- Brake firmly once (when it is safe) and feel for pulsing, grinding, or a soft pedal.
- Accelerate hard onto the highway and watch the mirror for smoke and feel for hesitation.
- Note how the transmission shifts. Automatics should be smooth, manuals should not slip or grind.
- Listen for clunks over bumps, which point to suspension wear.
If the seller is reluctant to let you take a proper drive, that hesitation is its own answer. A reliable choice like the Toyota Corolla and whether it earns its reputation still deserves the same honest twenty minutes behind the wheel.
Match the paperwork to the car
Numbers should agree with each other. Check that the vehicle identification number on the dashboard matches the door jamb sticker, the title, and the listing.
Ask for service records. A folder of receipts showing regular oil changes and timing service is worth more than any verbal promise. Run the VIN through a history report and read it for accident records, title brands, and odometer rollbacks.
Body and panels, filler and rust, tires, engine bay, underbody leaks, interior and switches, dashboard lights, the test drive, the paperwork, fluids and maintenance, a mechanic's inspection, and finally the price talk. Walk them in order and very little slips past you.
Confirm fluids and maintenance history
Beyond the oil you already checked, look at the brake fluid (dark fluid is old) and the power steering fluid. Ask when the timing belt was last done if the car uses one, because that single overdue job can wreck an engine.
| What you see | What it usually means |
|---|---|
| Milky residue under oil cap | Possible head gasket trouble |
| Red puddle on the ground | Transmission fluid leak |
| Uneven tire wear | Alignment or suspension issue |
| Mismatched panel color | Prior bodywork or collision |
| Sweet smell, warm engine | Coolant leak |
Pay a mechanic before you pay the seller
For any car you are seriously considering, spend the roughly $100 to $150 on a pre-purchase inspection at an independent shop. A lift and trained eyes catch frame rust, worn ball joints, and leaks you simply cannot see in a driveway.
An honest seller will not flinch at this. If someone refuses to let the car leave for an hour, walk away with your wallet still closed.
Use what you found to talk price
Every flaw on your list is a fair point in the conversation. Worn tires, a leaking valve cover, or brakes near the end of their life are real costs you can bring to the table.
This is also the moment to know your numbers cold, and a little homework on how to negotiate a fair car price turns your inspection notes into leverage. If the math on owning the car still feels heavy, it may be worth comparing it against whether leasing or buying saves you more money for your situation.
How long should a used car inspection take?
Plan on about an hour for your own walkaround and test drive, and a second appointment for a mechanic. Rushing is exactly how hidden problems get missed, so resist any pressure to hurry.
Is a pre-purchase inspection really worth the cost?
Almost always. Spending around $120 to find a cracked frame or a failing transmission can save you thousands, and even a clean report buys you peace of mind and negotiating room.
What is the single biggest red flag to watch for?
A seller who rushes you or refuses a proper test drive and an independent inspection. Honest sellers welcome scrutiny, so reluctance usually means there is something they would rather you did not find.
Buying a used car well is mostly about refusing to be hurried. Run these twelve points in order, trust what your eyes and ears tell you, and let a mechanic confirm it before any money changes hands. Do that, and the only surprises left will be the good kind, like realizing the car you almost rushed past is the one that fits your life perfectly.